Custom Firewall Rules
In addition to the default firewall rules, you can create custom firewall rules to limit access in specific ways. This gives you greater control and detail over the different firewalls you use as part of the Personal firewall control protection.
In this topic:
Add custom firewall rules with a CSV file
If you want to maintain firewall rules externally, you can upload a CSV file with details on the rule.
To import custom firewall rules using the CSV file, follow these steps:
In your sensor policy, in the Endpoint controls screen, find the Personal firewall control option.
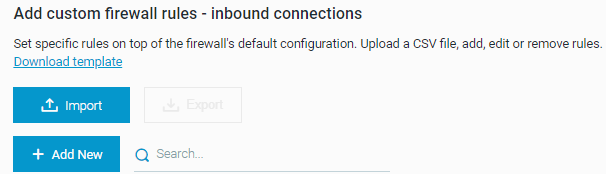
In the Personal firewall control section, in the Add custom firewall rules - inbound connections area or the Add custom firewall rules - outbound connections, click Download Template.
Note
In the download page, ensure you download the correct version of the template. Use the templates that end with GA. For example, use outbound_connections_template_GA.csv. To download Cybereason GA templates, see Custom Firewall Rules CSV Template.
In a CSV file editor, open the CSV file template, fill in the fields, and save the template with the .csv suffix (for example, inboundconnections.csv).
For more information about the CSV file fields, see Custom firewall rules - fields description.
Note
If you add Japanese rules, the header row must be in English, and the file must use the UTF-8 encoding before you import the file. If any Japanese characters do not display properly, Cybereason recommends that you edit the file using a text editor.
In the Add custom firewall rules - inbound connections area or the Add custom firewall rules - outbound connections, click Import.
Navigate to the file that you created, and click Open.
The Cybereason platform checks if the number of columns in the header of the CSV file matches the number of columns in one or more of the rows. If there is a mismatch in the number of columns, the Cybereason platform does not import the CSV and uses the previously imported CSV file. The Error uploading CSV file dialog box is visible, and lists the rows that include errors:
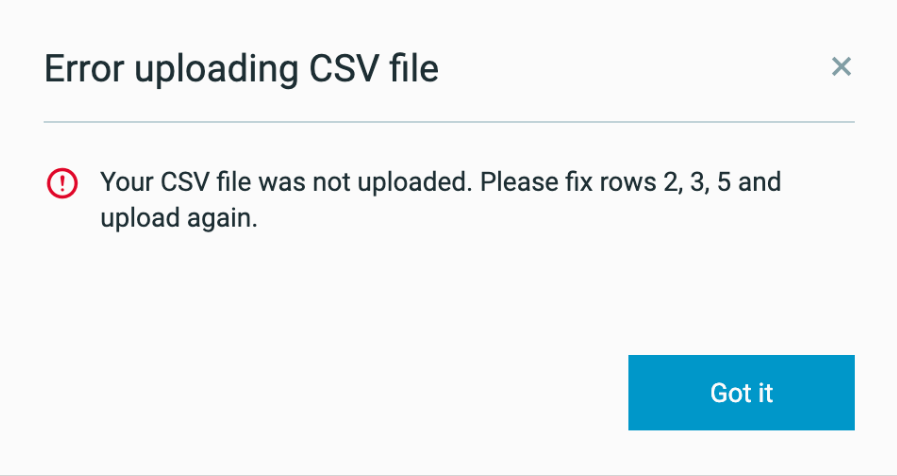
If a mismatch exists, fix the rules on the specified rows and upload the file again. For a list of restrictions and solutions for potential errors, see Address problems with custom firewall rules.
When you upload a new custom firewall rules CSV file, the Cybereason platform deletes any rules you added previously with the Add New button. If you still need those rules, ensure you back up existing rules.
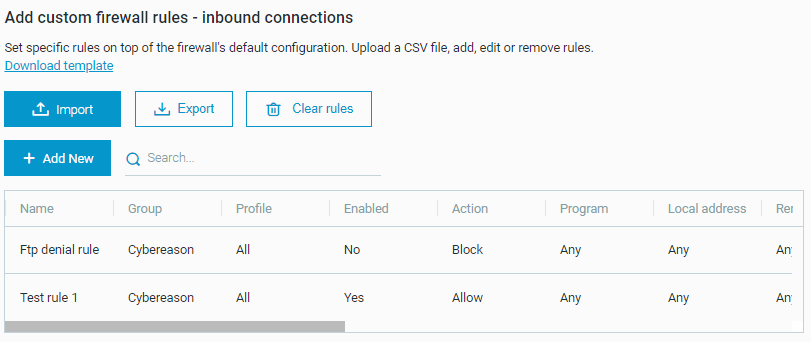
After the upload completes successfully, you can then view the rules in a table.
You can look at the Windows Firewall on a relevant endpoint to verify whether a rule was successfully applied. For more details, see Block FTP access.
Note
If a user manually removes a custom firewall rule using Windows Firewall, the Cybereason platform sets the Firewall control mode in the System > Sensors screen to Misconfigured rules. For more details, see Custom firewall rules validation.
On Linux machines, the Cybereason platform applies Linux custom firewall rules in priority order from the top of the rules list to the bottom of the list (both in the CSV file and for rules added directly in the sensor policy. If the top rule’s condition statement matches a network traffic connection, the Cybereason platform activates the top rule, and overwrites any subsequent rules that contradict the top rule.. When writing custom firewall rules for Linux endpoints, make sure that the highest priority rule is on top.
Likewise, in a scenario where a Linux endpoint machine is isolated, the Cybereason platform prioritizes the isolation higher than the custom firewall rules applied to that endpoint.
Add custom firewall rules directly in the sensor policy
Important
If you upload a new custom firewall rules CSV file, the Cybereason platform deletes any rules you added previously by using the Add New button.
If you do not want to use the CSV file to add rules, you can also add these rules using the sensor policy.
To add a new custom firewall rule in a sensor policy, follow these steps:
In your sensor policy, in the Endpoint controls screen, under the Personal firewall control option, locate the Add custom firewall rules - inbound connections area or the Add custom firewall rules - outbound connections area (depending on whether you want to add inbound or outbound rules).
Click Add New.

In the Add rule window, fill in the fields for this rule and click Save.
If you do not fill in a required field or if you fill in a field incorrectly, the field text box is marked in red and an error message provides information about the problem. For example, a Required field error is visible if a required field is empty. The Save button is disabled until you fill in all of the fields correctly.
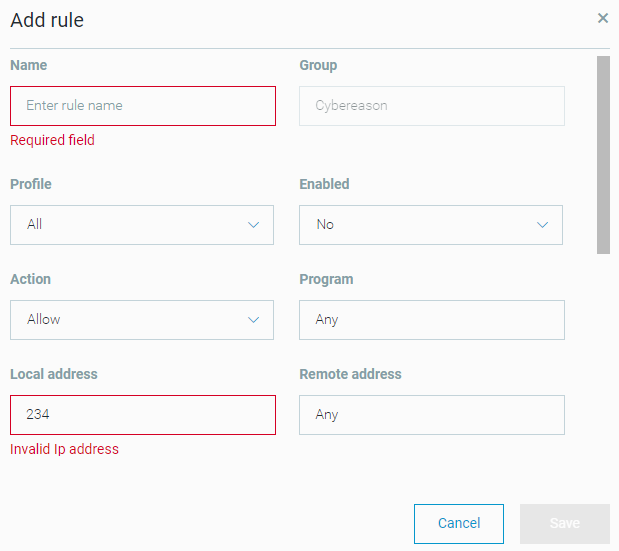
For information on how to fill in the fields, see Custom firewall rules - fields description.
After you successfully save a rule, the rule is visible at the top of the table of custom firewall rules.
Custom firewall rules - fields description
When you add a custom firewall rule, you must use the following fields:
Field Name |
Description |
Required/Optional |
Format/Values |
|---|---|---|---|
Name |
The identifier for the rule |
Required |
A string with the rule name. |
Group |
For system use and non-configurable. Specifies the group name, used to tag rules in the same category. |
N/A |
You cannot change the default value Cybereason. When you edit a rule directly in a sensor policy, this field is set to the default value and cannot be changed. When you upload rules using the CSV file, if you add another value for this field, the Cybereason platform automatically reverts the value to the default value of Cybereason. |
Profile |
Specifies the network profile to which this custom firewall applies. |
Optional |
Enter one of the following (case-sensitive) in the CSV file or select the network profile in the sensor policy:
Important: If you enter a list of multiple network profiles in the CSV file, surround the list with quotation marks, for example, “Private,Domain”. This field is not supported on Linux endpoints. If you provide a value for this field for a Linux endpoint, the Cybereason platform does not apply this field to the rule. |
Enabled |
Specifies whether the rule is active. |
Optional |
Enter or select one of the following:
Disabled rules are visible in Windows Firewall under Inbound Rules or Outbound Rules. However, enabled rules are not visible under Monitoring > Firewall in Windows Firewall. Only active rules that match the current network profile are visible under Monitoring > Firewall. |
Action |
Specifies the action for the rule. |
Required |
Type or select one of the following:
If you set the AuthorizedUsers/Authorized users or AuthorizedComputers/Authorized computers fields to a value other than Any, you must enter or select the Secure value. |
Override |
For system use and non-configurable. Specifies whether to override default system specifications. |
N/A |
The default value, No, cannot be changed. When you edit a rule directly in a sensor policy, this field is set to the default value and you cannot change this value.. a When you edit rules using the CSV file, the Cybereason platform will revert any values you add for this field automatically to the default value of No. |
Program |
Provides the full path of the file or process to which the rule applies. |
Optional |
Example format: C:\windows\system32\CompatTelRunner.exe Important: For Linux endpoints, do not provide a value for this field. If you provide a value for this field on a Linux endpoint, the Cybereason platform does not apply the custom firewall rule. |
LocalAddress (in the CSV file) Local address (in a sensor policy) |
The IP address of the local machine. |
Optional |
Enter one of the following:
Important: If you enter a list of multiple IP addresses in the CSV file, surround the list with quotation marks, for example, “192.168.1.0/24,192.168.1.1-192.168.1.50”. |
RemoteAddress (in the CSV file) Remote Address (in a sensor policy) |
The IP address of the remote machine. |
Optional |
Type one of the following:
Important: If you enter a list of IP addresses in the CSV file, surround the list with quotation marks, for example, “192.168.1.0/24,192.168.1.1-192.168.1.50”. |
Protocol |
The network protocol |
Required |
Example values:
When you add a rule directly in the sensor policy, you can either type a protocol or select a protocol from the drop-down menu. |
LocalPort (in the CSV file) Local port (in a sensor policy) |
Specifies the port on the local machine (the endpoint running the sensor).
|
Optional |
Type a single port or a list of ports. Example values:
Important: If you enter a list of ports in the CSV file, surround the list with quotation marks, for example, “80,443,8000”. |
RemotePort (in the CSV file) Remote port (in a sensor policy) |
Specifies the port on the remote machine.
|
Optional |
Type a single port or a list of ports. If you type a list of ports, separate the list by commas and surround the list with quotation marks. Example values:
Important: If you enter a list of ports in the CSV file, surround the list with quotation marks, for example, “80,443,8000”. |
The following fields are used only in advanced cases:
AuthorizedUsers (CSV) or Authorized users (UI): Available only for inbound connections
AuthorizedComputers (CSV) or Authorized computers (UI)
AuthorizedLocalPrincipals (CSV) or Authorized local principals (UI)
LocalUserOwner (CSV) Local user owner (UI)
ApplicationPackage (CSV)
Note
These fields for advanced cases are not supported on Linux endpoints. If you provide a value for any of these fields for a Linux endpoint, the Cybereason platform does not apply the field to the rule.
If you use custom firewall rules CSV file, if you modify the AuthorizedUsers field or the AuthorizedComputers field (you set one of these fields to a value other than Any), set the Action field to Secure. For example, if you created a firewall rule named TestRule and you modified the AuthorizedUsers field, you must also set the Action field to Secure.
Custom firewall rules validation
When you add a custom firewall rule, the Cybereason platform performs checks to ensure that custom firewall rules are applied and configured correctly and takes action to address issues in the following scenarios:
Scenario |
System Behavior |
Next Steps |
|---|---|---|
You import a custom firewall rules CSV file where the number of columns for a custom firewall rule does not match the number of columns in the header row. |
The Error uploading CSV file dialog box is visible, indicating the rows that include errors. In addition, the Cybereason platform does not upload the CSV file. |
Fix the errors on the specified rows and upload the file again. For a list of restrictions and solutions for potential errors, see Address problems with custom firewall rules. |
An administrator defines a custom firewall rule incorrectly, saves the rule or the CSV file, and publishes the policy. The Windows API applies default values or otherwise modifies the rule. For example, when Windows detects a firewall rule that defines a port number without a protocol, Windows API updates the Port value to Any, and uses the default Protocol value, which is also Any. These settings might disconnect the endpoint machine from the Cybereason platform and might even block the internet connection. |
The Cybereason platform does not apply the misconfigured rule., but the custom firewall rule is still visible in the table of rules in the Personal firewall control section. In addition, the Cybereason platform shows the Firewall Control mode for sensors assigned the policy with the rule error as Misconfigured rules in the System > Sensors screen. |
Find the name of the custom firewall rule that failed validation in the endpoint’s log files, retrieved via the Fetch sensor log action in the System > Sensors screen. Then, fix the rule error. For details on how to resolve the errors, see Address problems with custom firewall rules. |
An administrator adds custom firewall rules, and then saves the rule or the CSV file and publishes the policy. An endpoint user then manually removes a custom firewall rule that belongs to the Cybereason group by using Windows Firewall. |
The Cybereason platform does not reapply manually deleted rules as part of the default Personal firewall functionality. However, the Cybereason platform may add the deleted custom firewall rule again as part of a policy update or other automatic update. However, the custom firewall rule is still visible in the table of rules under the Personal firewall control section. In addition, the Cybereason platform displays the status Firewall Control mode for sensors assigned to this policy as Misconfigured rules in the System > Sensors screen. |
To add back the custom firewall rule, add the rule in the sensor policy and save the policy again. If the Cybereason platform reapplied the custom firewall rule, and you want to remove this custom firewall rule, you can delete the rule in a sensor policy, or import a new custom firewall rules CSV file that does not include the undesired rule. |
Address problems with custom firewall rules
If you have issues with custom firewall rules, such as the status of Misconfigured rules for a sensor in the System > Sensors screen, you can verify any of the following:
Issue |
What to Check |
Incorrect |
Correct |
|---|---|---|---|
Specific ports with incorrect protocol |
If you add a rule that specifies remote or local ports, ensure you define the protocol correctly. |
You added a firewall rule with the following settings:
When Windows Firewall detects this rule with the Protocol field value set to Any, the Windows Firewall disregards the specific port values and sets both values to Any. These settings might disconnect the endpoint machine from the Cybereason platform. |
Update the firewall rule with the following settings:
|
Mismatch on columns in the CSV file |
When you add a custom firewall rules with the CSV file, make sure that the number of columns for each rule matches the number of columns in the header row. If the Cybereason platform cannot match the number of columns in the header row with the number of columns for a specific rule, the Cybereason platform does not upload the CSV file. |
The table includes 16 columns in the header row, and the first rule in the table includes 15 columns. |
Update the CSV file to make sure the table includes 16 columns in the header row, and all rules in the table include 16 columns. |
Spaces in names in the header row |
When you add custom firewall rules with a CSV file, ensure that the names in the header row do not contain spaces. |
You added values in the header row such as Local Port. |
Ensure the value in the header row is LocalPort. |
Incomplete IP addresses in IP ranages |
Make sure that the IP ranges used for rules contains two complete IP addresses. |
You added the IP range of 192.168.1.1-50 |
Update the IP range to the format 192.168.1.1-192.168.1.50 |
Incorrect Action field for specific advanced fields |
When you add custom firewall rules with the CSV file, if you modify the AuthorizedUsers or AuthorizedComputers of these fields for a rule, set the Action field to Secure. |
You create a firewall rule with the following settings:
|
Update the firewall rule with the following settings:
|
Lists of vales not grouped with quotes |
When using a custom firewall rules CSV file, if you use a comma-separated list, ensure you surround the list with quotation marks. |
|
Update the rule to the format “192.168.1.501,192.168.1.100”** and “21,22”. |